
Let’s understand before installing SDK we need to install JAVA 11 SDK
Steps for running the cloud SDK in the local
- Install Java 11 SDK
- Verify the version using the java — version command
- Download the cloud SDK latest Jar from https://experience.adobe.com/#/downloads using your organization's Adobe ID
- Unzip downloaded aem-sdk-<version>.zip file
- Copy the Jar file to a separate working folder of yours.
Before creating an instance we need to understand two different instances we have author and publish instance.
Author Instance
The author instance is completely responsible for content and asset authoring which can only be handled by admins and content authors. It is generally hosted on 4502 port.
Follow the below steps to create an AEM instance
- Creating an AEM instance required naming the AEM jar file as aem-author-p4502.jar
- Double-click on the jar file to create a brand new AEM instance. After clicking on AEM Jar will open the below window. It will take a good amount of time around 15 to 20 min to start AEM for the first time. Next time onwards it will take max 5 minutes to start the instance

- Once the AEM instance is up and running, it will open a browser with the below page open.
- Provide username and password as admin which is OOTB that can also be changed.

- After login, it will open below screen

- Clicking on the below question mark sign will help us to see the Adobe Experience Manager version. Currently, we have having 6.5.0 version installed.


Below are the important URLs which we be will using most of the time working on AEM
- Content Page URL for all content / website pages - localhost:4502/sites.html/content
- Asset / DAM Page URL for all media files - localhost:4502/sites.html/content
- Code Editor URL to access code file - localhost:4502/crx/de
- Package Manager URL to access, build, and install code and content packages. -localhost:4502/crx/packmgr
- System Console Bundle to access all bundles or jar files. It helps us to check bundle status as install, active, resolved, etc. - localhost:4502/system/console/bundles
- System Console Components to check both out-of-the-box and custom components. -localhost:4502/system/console/components
- System Console Configurations to check and manage all the out-of-the-box or system-level configurations - localhost:4502/system/console/configMgr
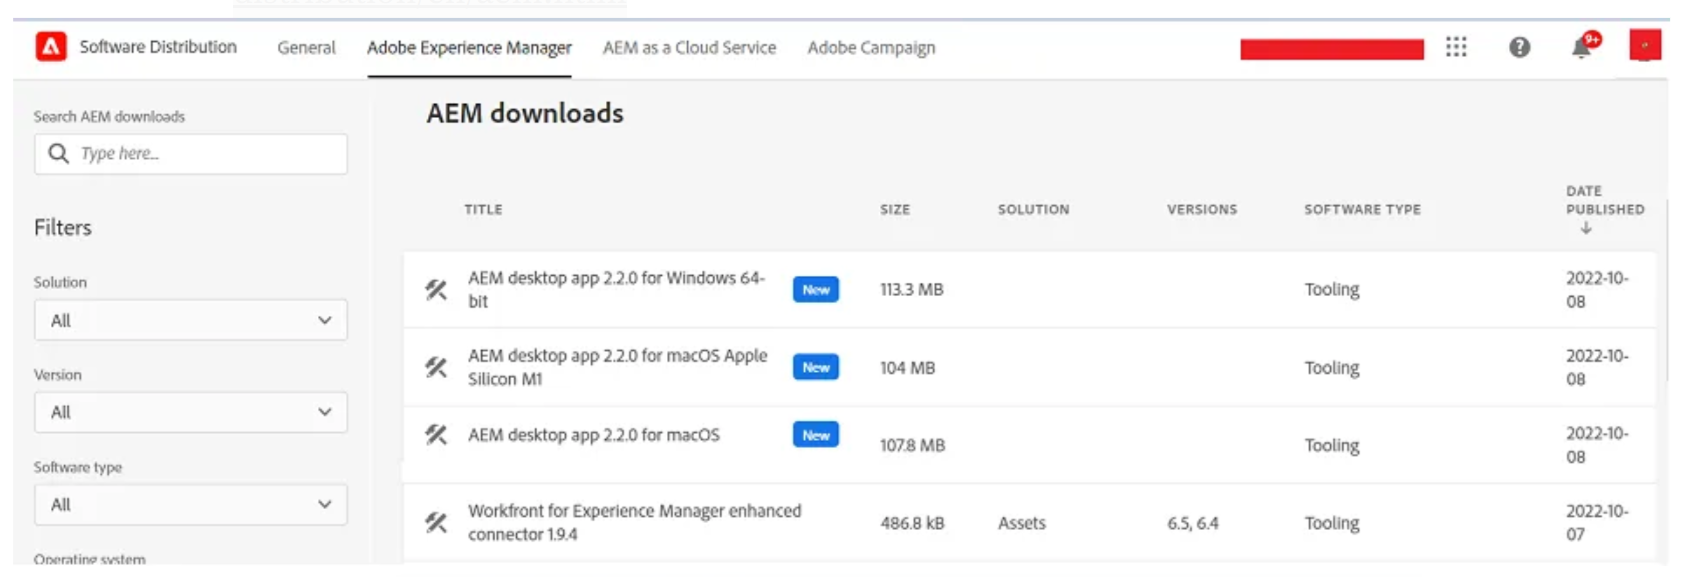
- We can install the same latest Service pack which can be installed from below Adobe Software distribution URL - https://experience.adobe.com/#/downloads/content/software-distribution/en/aem.html
How to Install Any Package
- We are going to Install the latest Service Pack 6.5.11 as part of the current installation. In your case, it may be a different or higher version.
- Go to the below crx package manage to install the 6.5.11 service pack and click on update package option highlighted as red in color
- localhost:4502/crx/packmgr

- Select the required service pack and click on OK will upload the zip file

- Click on the install button as mentioned in the below screenshot will install the service pack and upgrade the version from 6.5.0 to 6.5.11.0

- After the installation process is complete please wait for at least 15 to 20 min.
- Hit the below URL to verify if the installation is successfully done. Please wait for 10 minutes if it is not loading proper page properly or giving an error


Setting up AEM Publish instance
- Copy the jar to a new folder publish and rename it as aem-publish-p4503.jar
- Open the command line on the current folder and run java -jar aem-publish-p4503.jar command to start the publish instance
- Once AEM successfully starts, it is accessible on http://localhost:4503 using any browser of your choice
Configure replication agents and content distribution
- Log in to the Author instance and navigate to http://localhost:4502/etc/replication/agents.author.html
- Click Default Agent to open the default replication agent
- Click on the edit to open the agent’s configuration
- Under the settings tab, update the following
- Enabled — check true
- Agent user ID — Leave this empty
- Under the transport tab
- Configure URI — http://localhost:4503/bin/receive?sling:authRequestLogin=1
- user — admin
- password — admin
- Click OK
Now, you can publish the changes from author to publish using these configurations
I hope you found this blog interesting and informative. Please share it with your friends to spread the knowledge.
.png)


0 Comments:
Post a Comment
Do leave your comments